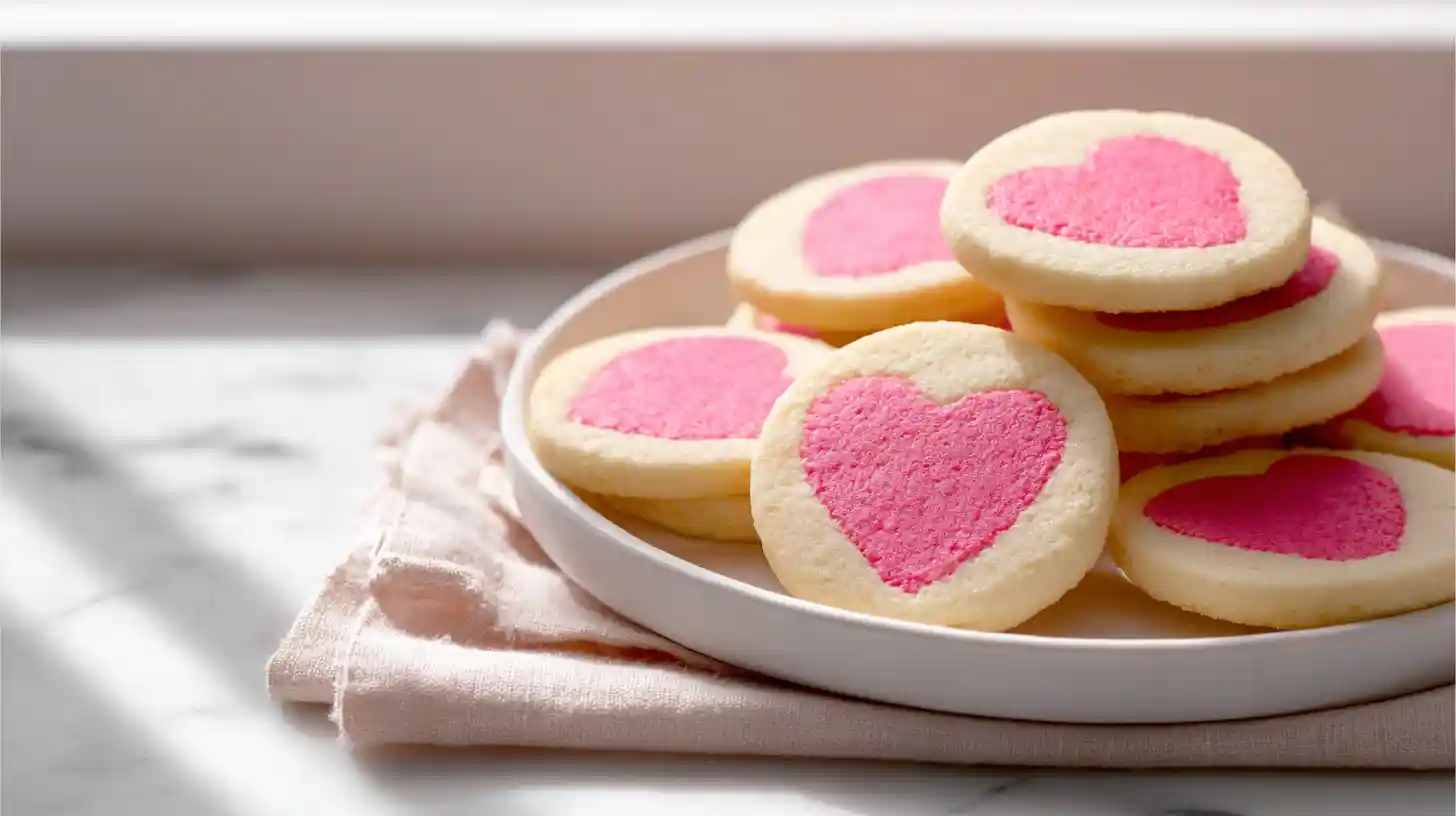
These Slice and Bake Heart Cookies bring Valentine nostalgia without the tube. I’ve been making slice and bake cookie designs for years, and hearts are honestly the easiest pattern to master. You roll dough, shape hearts, freeze them solid, wrap with more dough, and slice. My kids ask for these every February.
The technique might sound complicated, but it’s simpler than decorating with icing. Each cookie reveals a pink heart when you slice through the log. They bake up tender with crispy edges, and you can make the dough days ahead.
What Makes These Different
Store-bought slice and bake Valentine cookies come loaded with artificial colors and preservatives. These use real butter and natural food coloring made from vegetables. The taste difference is wild – buttery, vanilla-forward, with a soft crumb that melts on your tongue.
You control everything here. Want deeper pink? Add more coloring. Prefer almond extract? Swap it in. The dough freezes beautifully for three months, so you can pull it out whenever you need fresh-baked cookies.
Essential Ingredients
- 3 cups all-purpose flour
- 1 teaspoon baking powder
- ½ teaspoon salt
- 1 cup unsalted butter, softened
- 1¼ cups granulated sugar
- 2 large eggs
- 2 teaspoons vanilla extract
- Natural pink food coloring (vegetable-based)
Use room temperature butter – it should dent when you press it but not feel greasy. Cold butter won’t blend smoothly. Natural coloring won’t give you neon pink, but you’ll get a lovely dusty rose that looks more sophisticated anyway.
Creating the Heart Pattern
Beat butter and sugar until fluffy and pale, about four minutes. This step adds air and creates the tender texture. Mix in eggs one at a time, then vanilla. Whisk flour, baking powder, and salt separately, then fold into the wet ingredients until just combined.
Divide dough in half. Leave one portion plain and color the other half pink. Start with a few drops – you can always add more. Knead the coloring into the dough until evenly distributed without streaks.
Roll pink dough to ½-inch thickness on parchment. Use a small heart cutter (around 1.5 inches) to cut out shapes. Press hearts together in a log formation – think of building a tunnel of hearts. Freeze this log for 20 minutes until firm.

Assembly Process
Roll plain dough into a rectangle about ¼-inch thick. Keep it soft – don’t chill this portion. Place your frozen heart log in the center and wrap the plain dough around it, sealing the seam by pressing gently. Roll the whole log smooth with your palms.
Wrap tightly in plastic wrap and freeze for at least one hour. The firmer it gets, the cleaner your slices will be. I usually make the dough at night and slice in the morning.
Baking Tips
Preheat your oven to 350°F. Line baking sheets with parchment. Slice the frozen log into ¼-inch rounds using a sharp knife. If the dough starts softening and the hearts smoosh, pop it back in the freezer for ten minutes.
Space cookies two inches apart. They spread slightly but hold their shape well. Bake for 10-12 minutes until edges turn golden. Centers might look underdone – that’s perfect. They firm up as they cool and stay soft inside.
Let cookies cool on the pan for five minutes before transferring to a wire rack. This prevents breaking and lets them set properly.
Variations to Try
Once you master how to make cookie dough hearts, experiment with different shapes. Stars work great for patriotic holidays. Ghosts are perfect for Halloween. Christmas trees look adorable in green.
Try these flavor swaps: add ½ teaspoon almond extract with the vanilla, mix in lemon zest for brightness, or fold mini chocolate chips into the plain dough. Each variation gives you completely different slice and bake design cookies.
For chocolate hearts, replace ¼ cup flour with cocoa powder in the colored portion. The contrast looks stunning and tastes even better.
Storage and Make-Ahead
Store baked cookies in an airtight container at room temperature for up to five days. Layer them with parchment to prevent sticking. They also freeze well for up to two months – just thaw at room temperature for 20 minutes.
The unbaked dough log is where this recipe shines. Wrap it tightly in plastic wrap, then foil, and freeze for up to three months. Slice and bake directly from frozen, adding one to two minutes to the baking time. Fresh cookies anytime you want them.
You can also refrigerate the dough log for up to four days if you’re baking soon. Just let it sit at room temperature for 10 minutes before slicing – it makes cutting easier and prevents cracking.
FAQ
Can I use gel food coloring instead of natural?
Absolutely. Gel colors give you more vibrant shades and won’t thin your dough. Start with a tiny amount because gel is super concentrated.
Why are my hearts distorting when I slice?
The dough isn’t frozen enough. Pop it back in the freezer for 15 minutes and use a very sharp knife. Wipe the blade between cuts to keep it clean.
How do I prevent the dough from cracking?
Let frozen dough sit at room temperature for 5-10 minutes before slicing. If it’s too hard, it’ll shatter instead of slice cleanly. Find that sweet spot where it’s firm but not rock solid.
Can I make these cookies vegan?
Yes. Substitute vegan butter and use flax eggs (1 tablespoon ground flax mixed with 3 tablespoons water per egg). The texture will be slightly different but still delicious.
What size heart cutter works best?
Around 1.5 inches across gives you the best visibility in the final cookie. Smaller hearts get lost, and larger ones make the dough log too thick to slice evenly.
How thick should I slice the cookies?
Aim for ¼-inch thickness. Thinner cookies spread too much and the hearts blur. Thicker slices take longer to bake and might have raw centers. Quarter-inch is the perfect balance.

Slice and Bake Heart Cookies
Ingredients
Equipment
Method
- Cream butter and sugar in a large bowl until fluffy and pale, about 4 minutes.
- Add eggs one at a time, mixing well after each. Stir in vanilla extract.
- Whisk flour, baking powder, and salt in a separate bowl. Fold into wet ingredients until just combined.
- Divide dough in half. Color one portion pink with food coloring, kneading until evenly distributed.
- Roll pink dough to ½-inch thickness. Cut out heart shapes with 1.5-inch cookie cutter. Press hearts together to form a log.
- Freeze heart log for 20 minutes until firm.
- Roll plain dough into a ¼-inch thick rectangle. Place frozen heart log in center and wrap plain dough around it, sealing seam.
- Wrap tightly in plastic wrap and freeze for at least 1 hour.
- Preheat oven to 350°F. Line baking sheets with parchment paper.
- Slice frozen dough log into ¼-inch rounds using a sharp knife. Place cookies 2 inches apart on prepared sheets.
- Bake for 10-12 minutes until edges are golden. Centers may look slightly underdone.
- Cool on baking sheet for 5 minutes before transferring to wire rack.
Notes
- Dough log can be frozen for up to 3 months. Slice and bake from frozen, adding 1-2 minutes to baking time.
- If hearts distort when slicing, freeze dough log for another 15 minutes.
- Use natural food coloring for a softer pink shade, or gel coloring for vibrant color.