
There is something deeply satisfying about biting into Crispy Ham Cheese Puff Pastry Stacks, especially when the layers shatter slightly and reveal that warm, melty center. This recipe is one of those simple wins that feels a bit fancy without asking much from you. Whether you are exploring new puff pastry recipes or just trying to use what is in your fridge, this one delivers every time.
The balance here matters, crisp pastry, savory ham, and just enough cheese to bind everything together without turning soggy. You can keep it classic or adjust it depending on what you have. It works just as well for breakfast brunch recipes as it does for quick snacks or light dinners.
What Makes Crispy Ham Cheese Puff Pastry Stacks Work
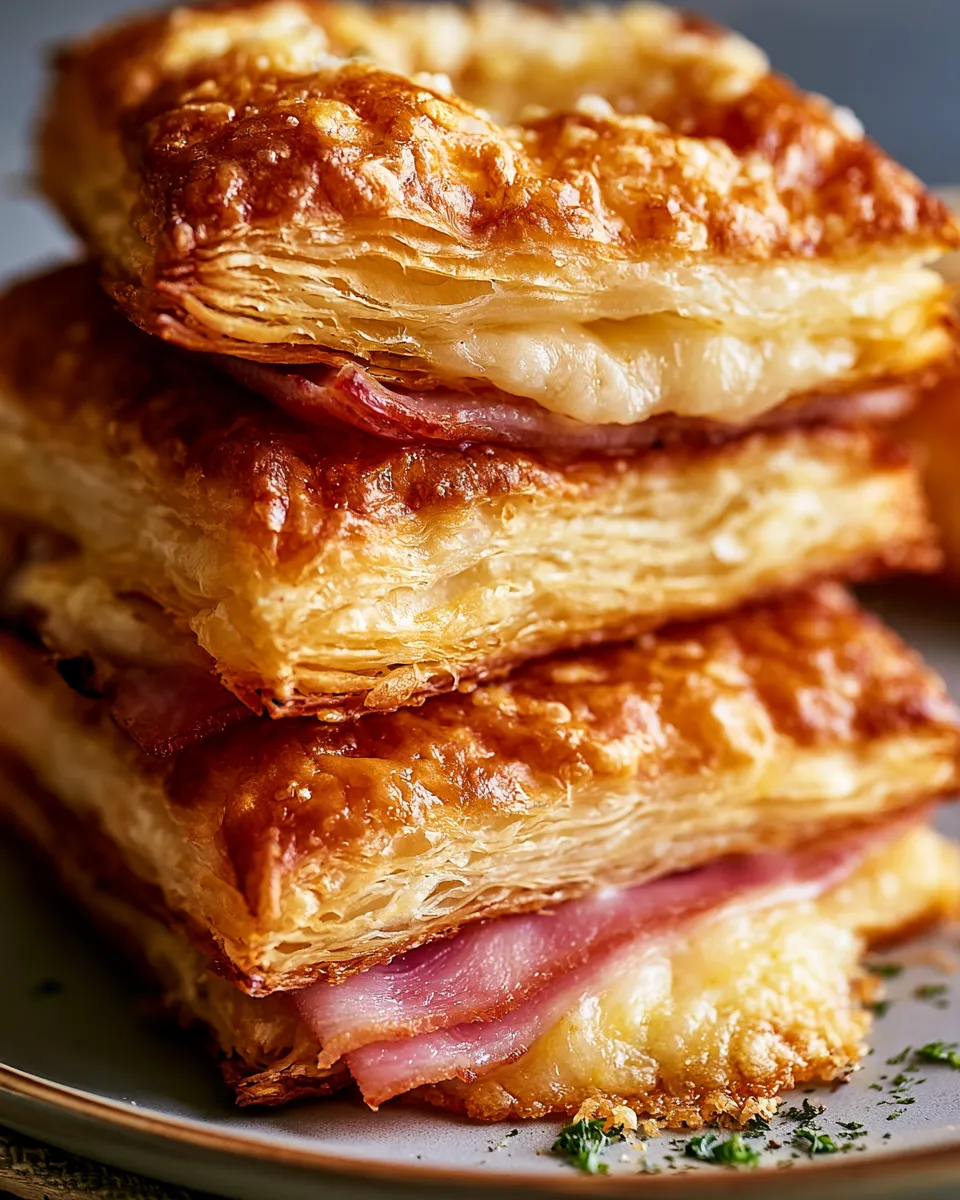
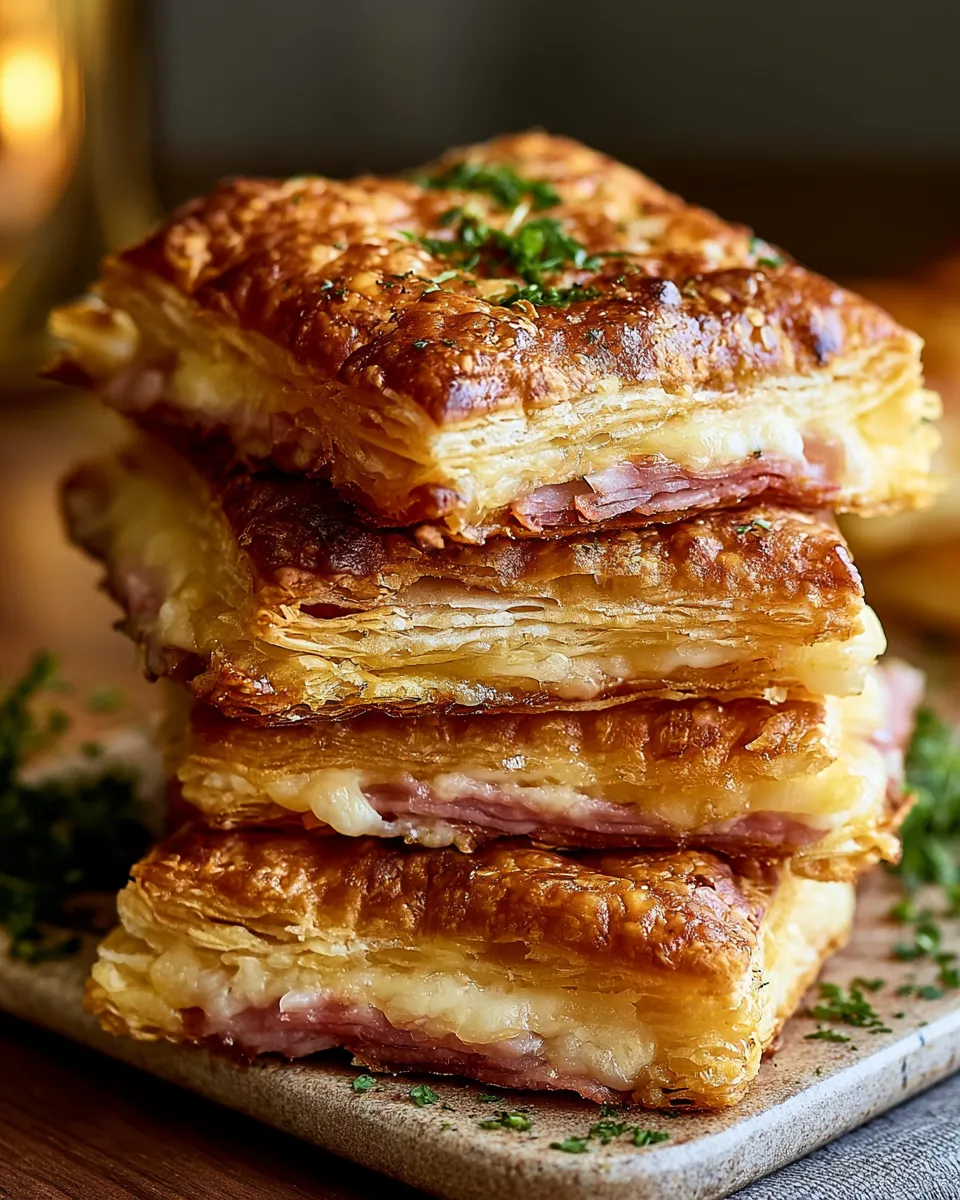
The magic comes from layering and heat. Puff pastry expands quickly in a hot oven, creating airy pockets while the edges crisp up. The ham adds a salty depth, while cheese melts into the layers without overpowering the pastry itself.
Using the right thickness is key. Too thin and the stacks collapse, too thick and the center stays undercooked. This is where many pastry recipes go wrong, but once you see the balance, it becomes second nature.
Ingredients You Will Need
- 1 sheet puff pastry, thawed
- 120 g sliced ham
- 120 g cheese, sliced or shredded (cheddar or Swiss works well)
- 1 egg
- 1 tbsp milk
- 1 tsp Dijon mustard (optional)
- 1 tbsp grated Parmesan
- Pinch of black pepper
Step by Step Assembly
- Preheat your oven to 200°C and line a baking tray with parchment paper.
- Roll out the puff pastry slightly to even the thickness.
- Cut into equal rectangles, aiming for 6 to 8 pieces.
- Spread a thin layer of mustard if using.
- Layer ham and cheese on half of the rectangles.
- Top with remaining pastry pieces and press edges gently.
- Whisk egg with milk, then brush over each stack.
- Sprinkle Parmesan and black pepper on top.
- Bake for 18 to 22 minutes until golden and crisp.
Let them rest for a few minutes before serving. The cheese settles slightly, making them easier to handle.
Pro Tips for Crisp Layers
Cold pastry works best. If it starts feeling soft while assembling, place it back in the fridge for a few minutes. This helps maintain clean layers during baking.
Avoid overfilling. It is tempting to add more cheese, but too much moisture prevents proper puffing. A thin, even layer gives better structure and keeps these as perfect appetizers or quick bites.
Always bake in a fully preheated oven. Puff pastry needs that initial heat burst to rise properly.
Ingredient Swaps That Still Taste Great
If you want to change things up, there are plenty of flexible options. This recipe adapts easily without losing its character.
- Swap ham with turkey or chicken slices.
- Use mozzarella for a milder cheese puff pastry texture.
- Add spinach or mushrooms for a vegetarian twist inspired by receitas vegetarianas.
- Try smoked cheese for deeper flavor.
Each variation keeps the flaky base intact while slightly shifting the flavor profile.
Common Mistakes and Fixes
If your stacks come out flat, the pastry may have been too warm before baking. Chill it briefly next time.
If the bottoms are pale, move the tray to a lower rack for the final minutes. This helps crisp the base without overbrowning the top.
Cheese leaking out is usually from overfilling or not sealing edges lightly. Press gently, but do not squash the layers.
Serving and Storage Ideas
Serve these warm when the cheese is still soft and the pastry crisp. They pair well with a light salad or even a simple soup, especially if you are building out breakfast brunch recipes.
For storage, let them cool completely before placing in an airtight container. They keep well in the fridge for up to 3 days.
To reheat, use an oven or air fryer instead of a microwave. This restores the crisp texture that makes ham and cheese pastries so satisfying.
Creative Variations to Try
Once you get comfortable with the base recipe, you can start experimenting. Puff pastry recipes like this are perfect for small tweaks.
- Add a thin layer of caramelized onions for sweetness.
- Sprinkle sesame or poppy seeds on top before baking.
- Include a touch of honey for a subtle sweet and savory contrast.
- Cut into smaller squares for bite-sized party snacks.
FAQ
Can I prepare these in advance? Yes, assemble them and keep refrigerated for a few hours before baking.
Can I freeze puff pastry stacks? You can freeze them before baking. Bake straight from frozen, adding a few extra minutes.
What cheese melts best? Cheddar, Swiss, and mozzarella all work well. Choose based on how strong you want the flavor.
Why is my pastry not crispy? Usually due to low oven temperature or excess filling. Keep layers balanced.
Can I make it vegetarian? Yes, replace ham with vegetables like spinach or grilled zucchini.
Do I need to thaw puff pastry fully? It should be thawed but still cold. Too soft pastry is harder to handle.
Crispy Ham Cheese Puff Pastry Stacks
Ingredients
Equipment
Method
- Preheat oven to 200°C and line a tray with parchment paper.
- Roll the puff pastry slightly and cut into rectangles.
- Layer ham and cheese on half of the pieces.
- Top with remaining pastry and press edges gently.
- Brush with egg and milk mixture, then sprinkle Parmesan.
- Bake for 18 to 22 minutes until golden and crisp.
Notes
- Keep pastry cold for best results.
- Avoid overfilling to maintain crisp layers.