
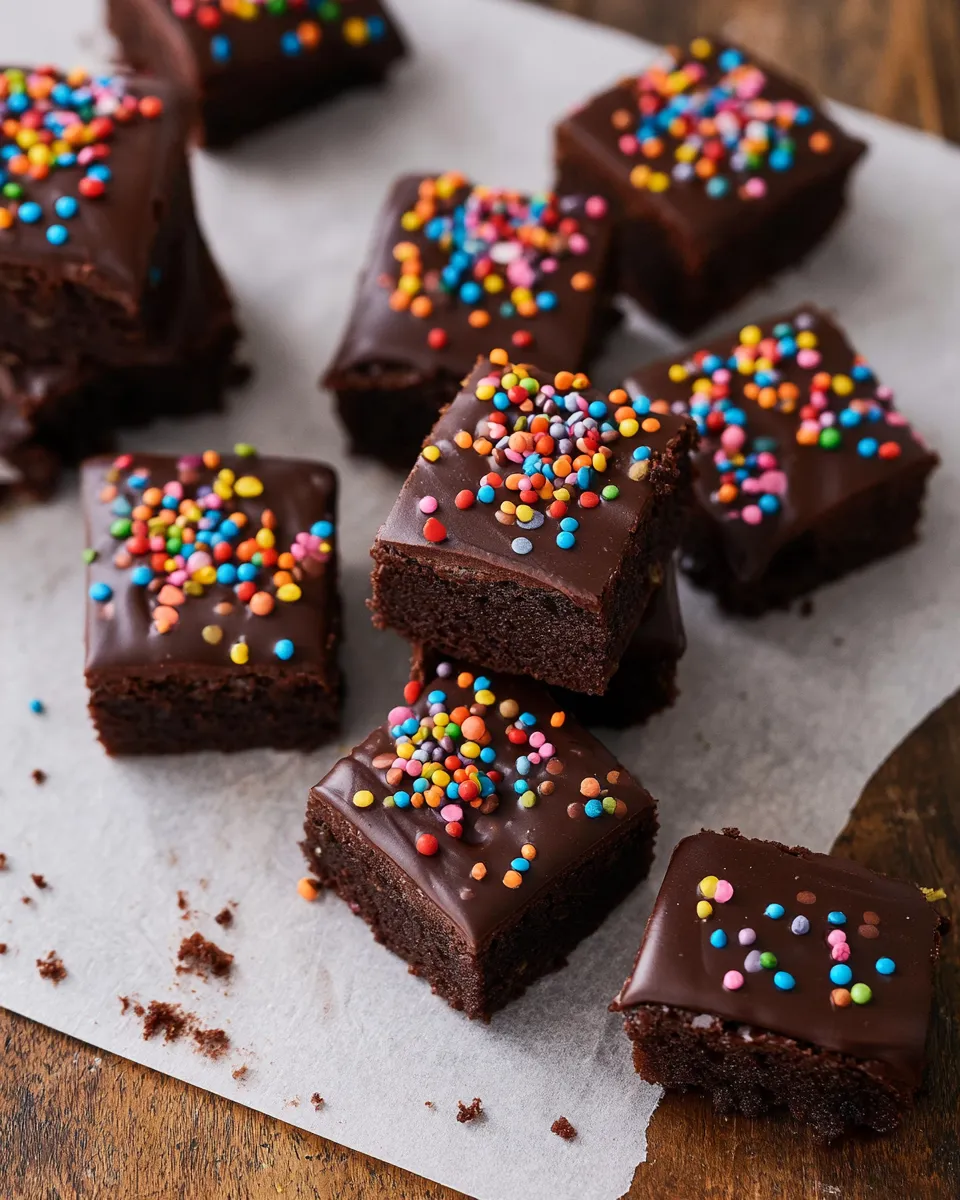
There is something genuinely satisfying about making a Cosmic Brownies Recipe from scratch. The store version is nostalgic, but a homemade batch goes further, denser chocolate, a silkier ganache top, and that same colorful chip finish that makes these bars so recognizable. They are one of those best homemade treats that look fun without requiring any decorating skills at all.
The texture is what sets these apart from a standard brownie. The goal is dense and almost fudge-like, not cakey, not dry. You want a bar that resists the fork just slightly before giving way. That texture comes from the right fat ratio and a careful bake time, which is worth paying attention to once you understand what to look for.
What Makes This Cosmic Brownies Recipe Different
Most brownie recipes can turn cakey if the flour or egg ratio tips too far. This version keeps the flour low and the fat high so the final bars hold that signature dense, slightly chewy bite. The ganache layer on top adds another dimension, a smooth, slightly firm coating that sets before the rainbow chips go on.
The rainbow chips are mostly decorative but they add a small candy crunch that changes the texture with every bite. If you are looking for easy fast sweet treats that still feel like a real baking project, this one covers both sides. Straightforward steps, but a result that looks and tastes genuinely made.
Ingredients for Cosmic Brownies Recipe
- 1/2 cup unsalted butter
- 1 cup granulated sugar
- 2 large eggs
- 1 tsp vanilla extract
- 1/3 cup unsweetened cocoa powder
- 1/2 cup all-purpose flour
- 1/4 tsp salt
- 1/4 tsp baking powder
- 1/2 cup semi-sweet chocolate chips, for the batter
- 1/2 cup semi-sweet chocolate chips, for the ganache
- 1/4 cup heavy cream, for the ganache
- 1/3 cup rainbow chip sprinkles or candy coated chocolate chips
The rainbow chips used in this cosmic brownies recipe are usually found near cake decorating supplies. If you cannot locate them, any small candy coated chocolate pieces work. The color and crunch are what matters here, not a specific brand.
Baking the Brownies
Melting the butter with the chocolate chips before adding the other ingredients keeps the batter smooth and helps build that dense, fudgy interior. Avoid overmixing once the flour goes in, since too much stirring develops gluten and makes the texture tighter and chewier in the wrong way.
- Preheat the oven to 175°C (350°F). Line an 8×8 inch pan with parchment paper.
- Melt butter and the first half cup of chocolate chips together in a saucepan over low heat, stirring gently until smooth.
- Remove from heat and whisk in sugar until combined.
- Add eggs one at a time, whisking after each, then stir in vanilla.
- Sift in cocoa powder, flour, salt, and baking powder and stir until just combined.
- Pour into the prepared pan and spread evenly.
- Bake for 20 to 22 minutes, until the edges look set and the center jiggles only very slightly.
- Let the brownies cool completely in the pan before adding the ganache.
Pulling the brownies early is intentional. Residual heat continues the bake as they cool, and an extra few minutes in the oven is usually what turns a fudgy brownie into a dry one. Check at 20 minutes and trust what you see at the edges, not the center.
Making the Ganache Topping
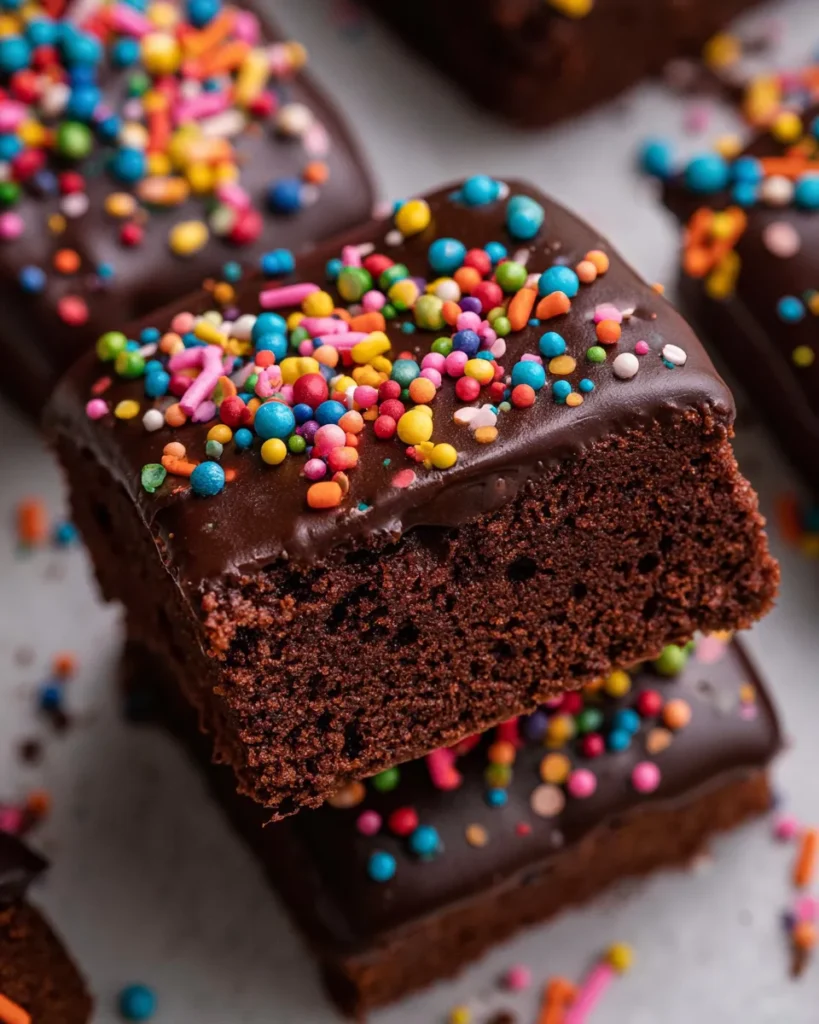
The ganache is a two ingredient step but timing matters. If you pour it over warm brownies, it soaks in instead of setting on top. Make sure the base is fully cool, then work quickly once the ganache is ready.
- Heat heavy cream in a small saucepan over medium heat until it just begins to simmer, not boil.
- Pour over the remaining chocolate chips in a bowl and let sit for 2 minutes.
- Stir slowly from the center outward until fully smooth and glossy.
- Pour over the cooled brownies and spread into an even layer.
- Immediately scatter rainbow chips over the surface before the ganache sets.
- Refrigerate for 30 minutes until the ganache firms up before slicing.
Chilling before slicing makes a big difference for clean cuts. A warm ganache smears when you press a knife through it. Cold ganache snaps cleanly and the bars lift out of the pan without pulling apart, which matters when these are headed to a table as quick party dessert squares.
Pro Tips and Ingredient Substitutions
Use a kitchen scale for the flour if possible. Measuring by volume often results in too much flour, which is a reliable way to end up with a cakey rather than fudgy brownie. Even one or two extra tablespoons can shift the final texture noticeably.
For a gluten free version, substitute the all-purpose flour with a 1:1 GF baking blend. Most of these work well in brownie recipes and keep the fudgy quality intact, making this a solid option among GF dessert ideas that still feel indulgent.
- Butter swap, use coconut oil for a slightly different but still rich result.
- Sugar option, light brown sugar adds a mild caramel note to the batter.
- Cocoa, use Dutch process cocoa for a deeper, darker chocolate flavor.
- Ganache variation, add a pinch of salt or a drop of espresso powder for a more complex topping.
Troubleshooting Common Problems
If the brownies come out cakey instead of fudgy, they were either overbaked or had too much flour. Use the toothpick test carefully, moist crumbs are fine, wet batter is not, but the center should not be completely dry.
Ganache that looks grainy usually means the cream was too hot or the chocolate was old. Pour the cream at a simmer rather than a full boil, and use fresh, good quality chips for a smooth result every time.
Storage and Serving
Store the finished bars in an airtight container at room temperature for up to 3 days, or in the fridge for up to 6 days. Cold brownies are denser and slice more cleanly, while room temperature ones are softer and more yielding.
For party baked goods presentation, cut them into uniform rectangles and arrange them on parchment in a single layer. They also freeze well for up to 2 months if wrapped individually, which is handy when you want easy things to bake with kids in batches and stash some for later.
FAQ
Can I double this Cosmic Brownies Recipe? Yes. Use a 9×13 inch pan and check for doneness at 22 to 25 minutes. The center will take a little longer to set with a larger batch.
Why did my ganache not set firmly? The cream to chocolate ratio may have been off. Use a 1:2 ratio of cream to chocolate for a ganache that firms when chilled. More cream makes it stay soft and saucy rather than setting up.
Can I use milk chocolate instead of semi-sweet? Yes, but the result will be sweeter. If you find the brownies too rich with semi-sweet, milk chocolate is a reasonable swap, especially for a favorite food for kids who prefer less intense chocolate.
How do I get clean cuts? Chill the pan fully, then use a sharp knife wiped clean between each slice. For very neat edges, run the knife under warm water and dry it before each cut.
Can I use a brownie mix as the base? Yes. Prepare any fudgy brownie mix according to the package directions, then follow the ganache and topping steps. The homemade batter gives a better result, but a mix works as a shortcut.
Where do I find rainbow chip sprinkles? Most craft and baking supply stores carry them near the cake decorating section. Online retailers also stock them. Any small candy coated chocolate or sugar piece works as a substitute.
Cosmic Brownies Recipe
Ingredients
Equipment
Method
- Preheat oven to 175°C (350°F) and line an 8×8 inch pan with parchment paper.
- Melt butter and first batch of chocolate chips together over low heat, then whisk in sugar, eggs one at a time, and vanilla.
- Stir in cocoa powder, flour, salt, and baking powder until just combined, then pour into pan and bake 20 to 22 minutes.
- Cool brownies completely before topping.
- Make ganache by pouring hot cream over chocolate chips, resting 2 minutes, then stirring until smooth.
- Spread ganache over cooled brownies, scatter rainbow chips on top, and refrigerate 30 minutes before slicing.
Notes
- Do not overbake, the center should look barely set when pulled from the oven.
- Cool brownies fully before adding ganache so it sets on top rather than soaking in.
- Use a warm, dry knife for clean cuts after chilling.